This post may contain affiliate links, meaning at no additional cost to you I may earn a small commission when you click a product or company link. As an Amazon Associate I earn from qualifying purchases.
Having recently switched from Android to an iPhone, I’ve had to relearn a few things about how to use my phone. If you have made a similar switch or are using an iPhone for the first time, read on for useful tips to make the most of your new phone. Even if you’ve been using iPhone for a while, you may still find some iPhone tips that are new to you.
For reference, I am using an iPhone 7 Plus running iOS 12.1.4. Some of these tips may not apply to different versions of the iPhone (for example, the iPhone X no longer has a dedicated Home button) or different operating system versions.
Related: How to Free Up Space in iOS 12 When iPhone Storage is Full
Table of Contents
1. switch between apps
Let’s start with a really basic iPhone tip. How do you switch between running apps? On Android, there’s a dedicated app-switcher button. To switch apps on the iPhone, you have two options.
Option 1: Double-click the home button. Double-clicking the home button will bring up the app switcher so you can choose which of your currently running apps you want to switch to.
Option 2: Hard press the left edge of the screen. 3D touch (also called force touch), available on iPhone 6S and later, involves using a hard press on the screen instead of a simple tap. When you press the left edge of the screen and either hold the press or do a half swipe to the right, you’ll bring up the app switcher.
To switch to the last app you had open, hard press on the left edge of the screen and either do a quick flick to the right or swipe straight across, all the way to the right.
2. go back within an app
If you’re coming from the Android with its dedicated back button, you may be wondering how to go back within an app. For example, maybe you want to go back to the last page you were viewing in Safari.
Some apps have a back button you can touch to go back, but here’s a quicker, easier option. To go back within an app, simply swipe across from the left of the screen to the right of the screen.
3. edit part of a word (two ways)
How do you get the cursor exactly where you want it to edit text? When you tap the middle of a word on an Android phone, the cursor will land where you tap your finger–even in the middle of the word. On the iPhone, the cursor will land only at the beginning or end of a word.
So how do you edit a word without erasing the whole thing? There are two solutions. First, you can tap the word and hold your finger there until a magnifying circle appears with a cursor. Then move your finger until the cursor lands where you want it.
The second way to edit a word is with 3D touch. To edit your word, hard press the keyboard rather than the text you’ve typed. Again, a magnifier window will appear with a cursor that you can move where you want it.
4. quickly undo typing
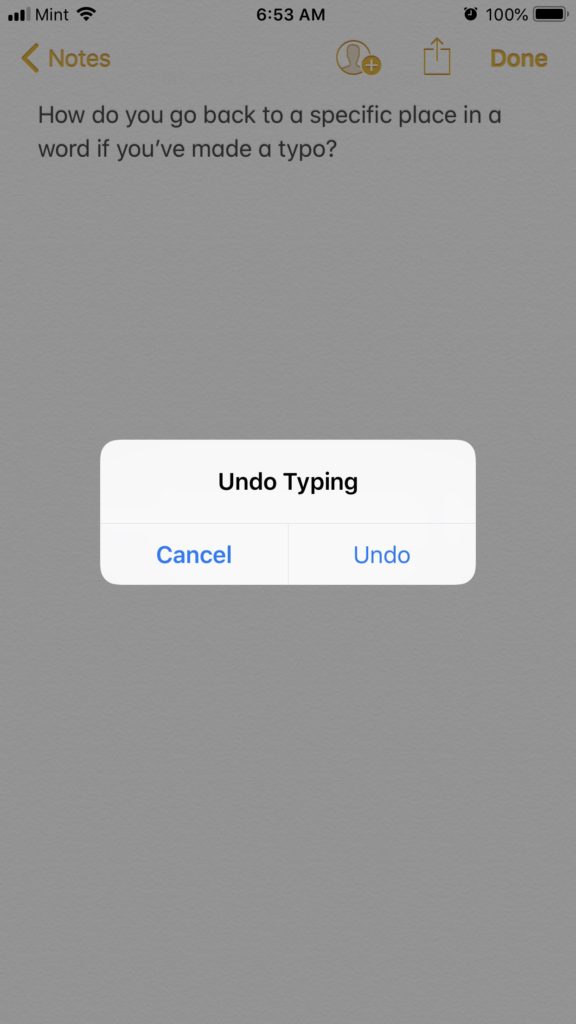
Where’s an “undo” button when you need it? Give your phone a quick shake to bring up the “Undo Typing” option. Shake again to undo more typing or redo the typing you just undid.
5. quickly search your phone or the web
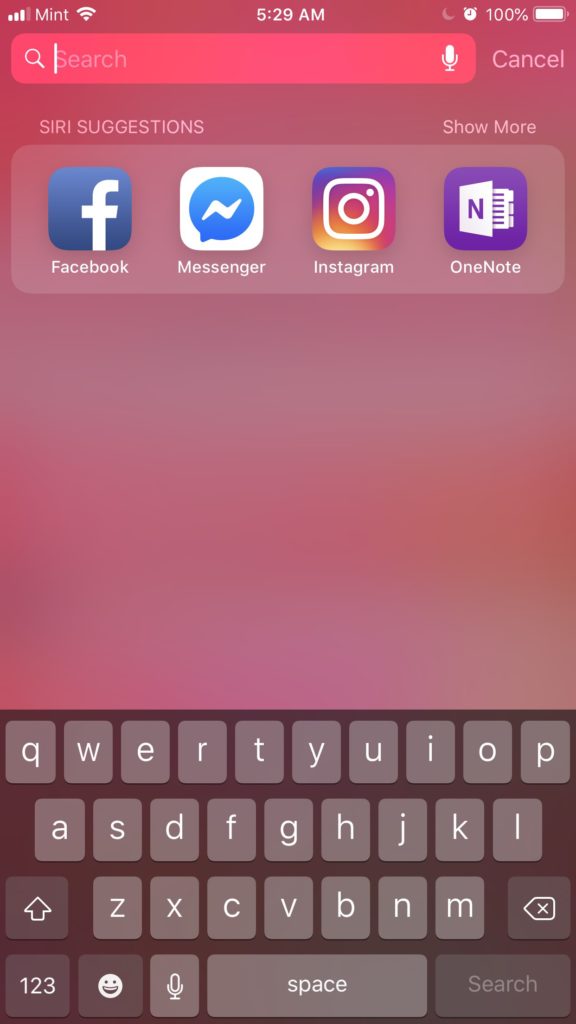
The iPhone has a cool feature called Spotlight Search that will search your app collection, music, movies, contacts, email messages–basically anything you have on your phone–and the internet, all in one go. Try searching for nearby restaurants or gas stations or a favorite television show. It’s a very user-friendly search interface.
Again, Apple gives us multiple ways to accomplish the same thing. To pull up Spotlight Search you’ll need to be on your home screen (where your app icons live). From the first page of apps, swipe from left to right–you’ll see the search bar at the top of that very first page.
This page also includes useful information, like what’s up next in your calendar. If you scroll down to the bottom, you can edit the widgets you see on this page. You can also access this Spotlight Search page from your lock screen by swiping from left to right.
Open a more streamlined Spotlight Search by swiping down in the middle of the screen (not the top edge–that will bring up your notifications) from any of your home screens.
6. manage your recent notifications
Which brings us to how to manage your notifications. Usually these will show up on your lock screen, but you can also pull them up from anywhere in your phone by simply pulling down from the top edge of your phone.
By the way, if you’re on your lock screen and wonder where older notifications that you haven’t cleared yet went, simply swipe up in the middle of the lock screen and they will come into view.
Clear specific notifications by swiping all the way from right to left or swiping left and selecting “Clear.” You can clear groups of notifications by tapping the “X” icon above the group.
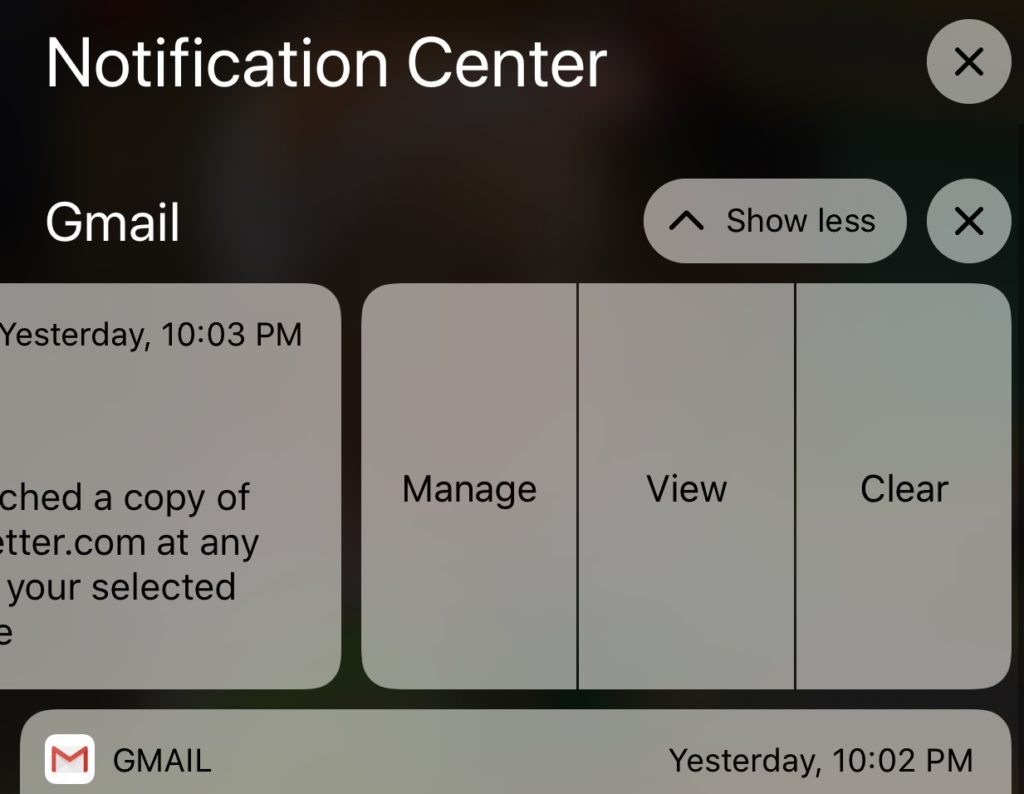
If you swipe left on a notification and tap “View,” you can perform quick actions–like archiving an email or responding to a text message–without even opening an app.
7. open your camera fast
In my post on switching from Android to iPhone, I mentioned how I missed the twist-to-open Moto gesture for the camera. But opening the camera on the iPhone is really just as simple. From the lock screen or the notifications screen, simply swipe from right to left. Voila! No need to hunt down the camera app.
By the way, a shortcut for taking a picture (if reaching the on-screen shutter button is a stretch) is to press one of the volume buttons. (It doesn’t matter which one.)
You can also quickly open the camera from the Control Center.
8. use the control center
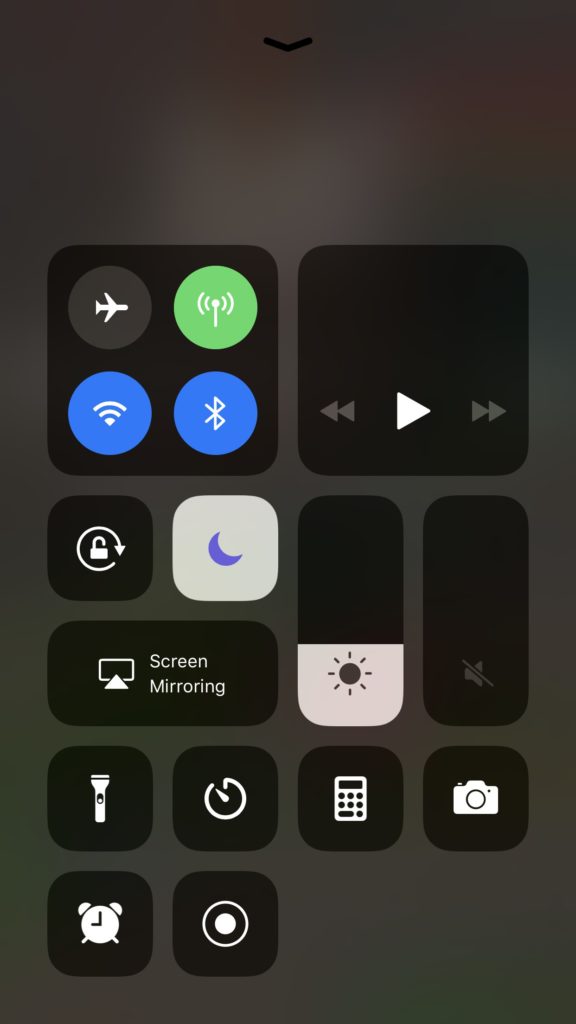
The Control Center is a quick way to access the apps and actions you use the most. To open it, simply swipe up from the bottom of your screen. From Control Center you can access your camera, airplane mode, currently playing music, flashlight, and more. To edit the apps you see in this screen, go to Settings > Control Center and tap “Customize Controls.”
Related post: How to find the cheap cellphone plan that’s perfect for you
9. preview links without opening them
Want to see a preview of a page before you decide if you want to click on the link or not? Simply use 3D touch to press on the link and pop open a preview. Hard press again to open the link in Safari or lift your finger to close the preview.
Want to do something else with the link? Swipe up while in preview mode to open a menu that will let you open, share, or copy the link or add it to your reading list.

Note: You can bring up the same menu without previewing the link by holding down on a link with a regular tap (not 3D touch).
10. jump to useful app actions
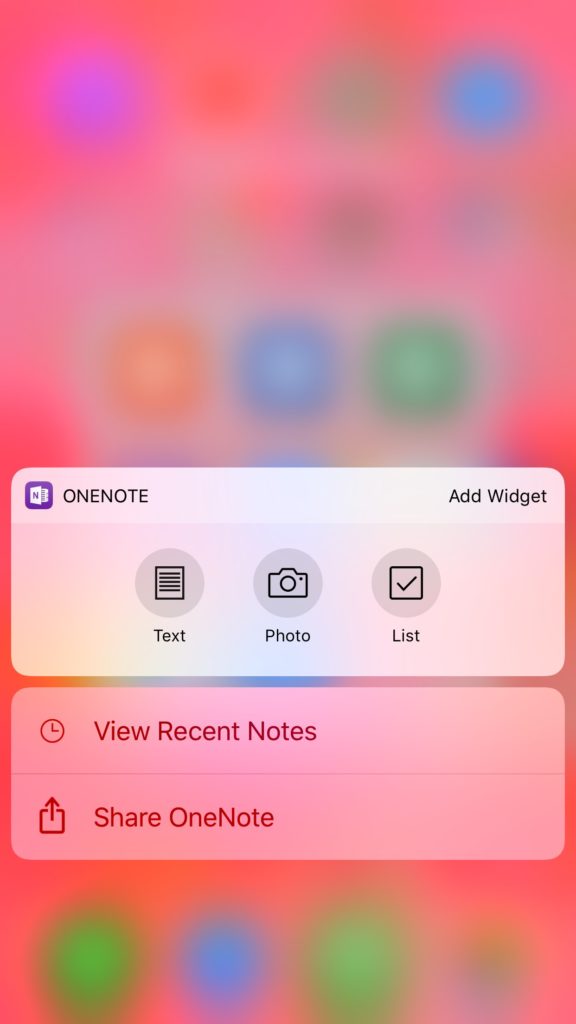
Want to jump to a common action in an app without actually opening the app? Many apps have built-in actions that you can access right from the home screen. Just try 3D-touching the app’s icon to see what actions are available.
For example, on the Settings icon you can quickly access Bluetooth, Wi-Fi, Cellular Data, and Battery settings. From the Starbucks app icon you can order, find nearby stores, add money to your card, or pay for your order. Try 3D-touching any of your favorite app icons to see what other options are available!
11. expand your vocabulary while you read
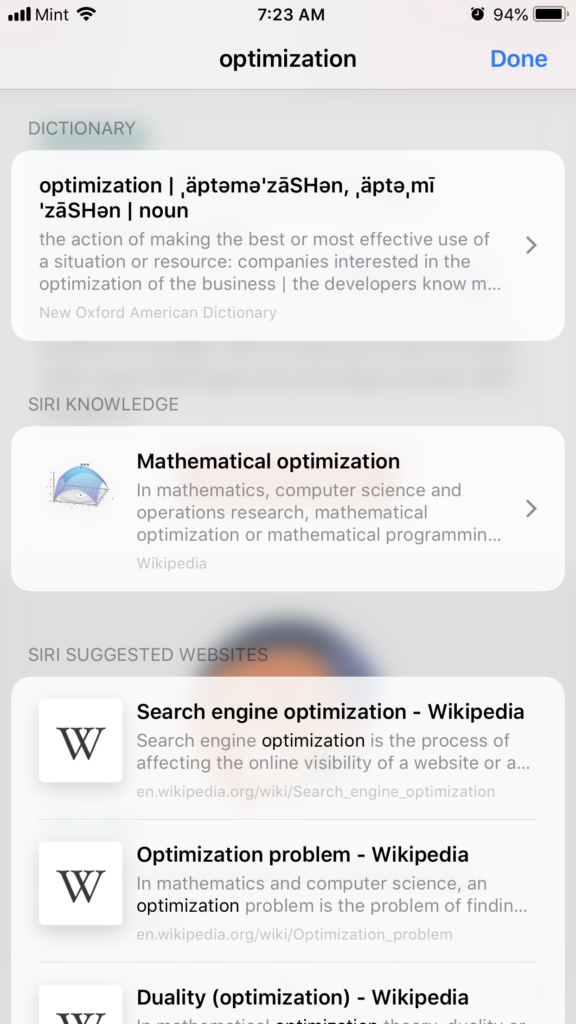
When you come across a word you want to learn more about, simply hold down on the word and select “Look Up” from the menu that appears. You’ll get word definitions and suggested search results for expanding your knowledge.
12. save time with custom text replacements as you type
In my post on switching from Android to iPhone, I mentioned that I missed the ability to search for emojis. One thing the iPhone has over the Android, though, is the way it suggests emojis as you type. Type “haha,” for example, and get various laughing-face emoji suggestions.
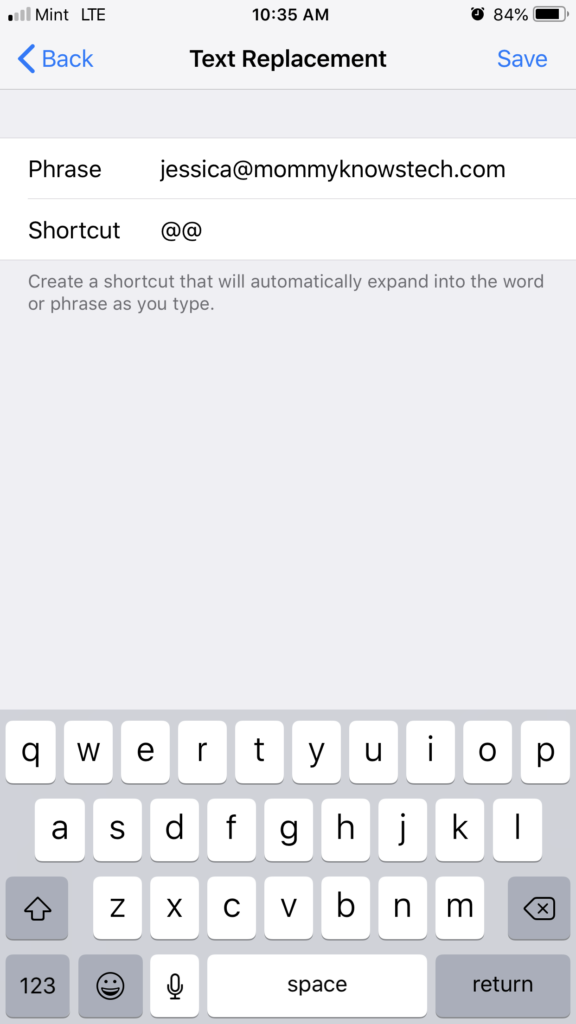
What’s even better, though, is that you can create your own custom text-replacement suggestions. Go to Settings > General > Keyboard > Text Replacement to set your own.
You can use text replacement for your favorite emojis, or you can use it more generally to auto-fill text that you type a lot. For example, one useful suggestion I found on another site is to set “@@” to autofill your email address so you don’t have to type the whole thing every time you need to fill in your email address.
13. tell Siri about nicknames and relationships
Speaking of useful replacement capabilities, you can tell Siri about the relationships you share with your contacts. There are two different ways you can set up contact relationships. First, you can simply tell Siri, for example, “Call Dad.” Siri will ask who your dad is and then remember this relationship the next time you say “Dad.”
The second way is to manually edit your contacts. Just open up the Contacts app and select the person whose info you want to edit. Tap “Edit,” then “add related name,” select the relationship from the available options, and tap the “i” to select the contact that the first contact is related to.
You can find your own contact card for the second part of the relationship, or you can pick any other contact. So you could, for example, make it possible to tell Siri, “Call my husband’s mother.”
To give your contacts nicknames, from the contact edit screen, tap “add field.” Select “Nickname” from the list of available options and then enter your contact’s nickname. Tap “Done” to save your changes. Now Siri will know who you mean when you use your contact’s nickname.
14. fix Siri’s pronunciation of your contacts’ names
My husband likes to tell people he knew I loved him when I was willing to trade “Andrews” for “Jueckstock.” I went from an easy name that anyone could pronounce to a name that no one knows how to pronounce or spell. But at least I can tell Siri how to pronounce it!
It’s possible to use Siri to correct her pronunciation, but the method is a little tricky. (See this post for details.) It’s simpler to use the Contacts app. Here’s how:
- Open the Contacts app
- Tap on the person’s name you want to edit
- Tap “edit”
- Scroll down to “add field” and tap on it
- Tap “Pronunciation first name” or “Pronunciation last name”
- Type in the pronunciation (I typed “Juckstock” for my last name.)
- Tap “Done”
15. get Siri to read to you
One of my not-so-secret hacks for having more time to read is audiobooks. With an audiobook, I can just pop in my earbuds and listen while I’m working on something else–like folding laundry or making supper. But what if you’re cheap like me and the only free version you can find of a book is in ebook form?
I don’t like to spend too much time staring at my phone when the kids are around, so having Siri read an ebook to me is a great solution. It requires a little more interaction with the page than a standard audiobook, but it does allow you to put your attention on other things while reading.
To enable this feature, simply open the Settings app and go to General > Accessibility > Speech. From here you can toggle on Speak Selection or Speak Screen to have Siri read text to you.
16. keep your kids locked to a single app
If you want to let your kid watch a YouTube video or play a game on your phone without exiting the app or navigating elsewhere, try turning on Guided Access. When this feature is on, you’ll need a passcode to leave the app. For more information about the settings that you can modify within a Guided Access session (for example, turning off the touchscreen), check out the Apple support article on this feature.
To turn it on, open the Settings app. Go to General > Accessibility > Guided Access and turn it on. Tap Passcode Settings to set your passcode or turn on Face ID or Touch ID. To start or end a Guided Access session, triple-click the Home button.
17. Find text on a page
For a little while after I got my phone, I thought that it wasn’t possible to search a web page in Safari for a certain word or phrase. And I wondered how it could possibly be a good idea to exclude such an important feature.
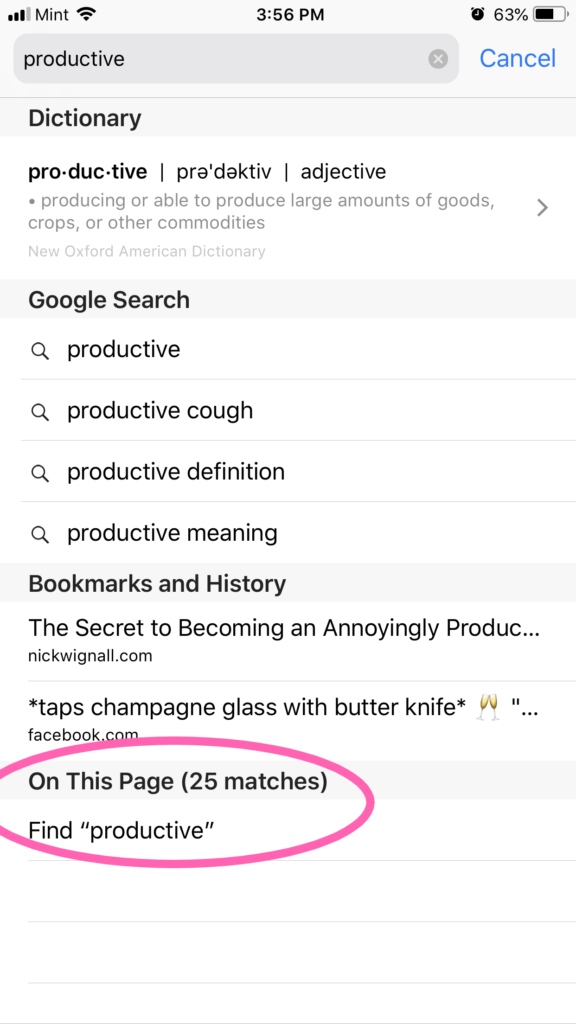
Turns out there are actually two ways to find what you’re looking for! The first option is to tap the address bar, type the text you’re looking for, and then scrolling down to the option that says “On This Page ([x] matches).” Tap “Find ‘[the word you’re searching for]'” and then use the arrow keys at the bottom of the page to jump through the search results.
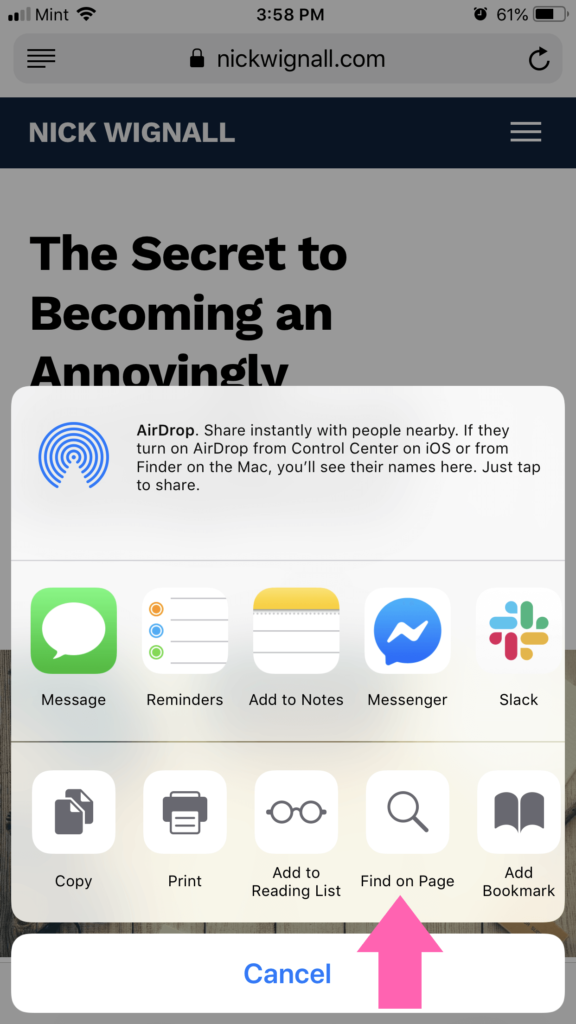
The second option is to go to the menu at the bottom of your Safari page and touch the button that looks like a square with an arrow pointing upward. (Normally this icon means “Share,” and you’ll see those options here as well.)
Above the Cancel button from the menu that pops up, you’ll see an option to “Find on Page.” Touch that and type the search term you’re looking for.
18. Automatically turn on “Do Not Disturb” overnight
If your phone rings, pings, or vibrates overnight with every new message or notification, it can have profound effects on your sleep. Sure, you can turn off the ringer, but what if you forget?
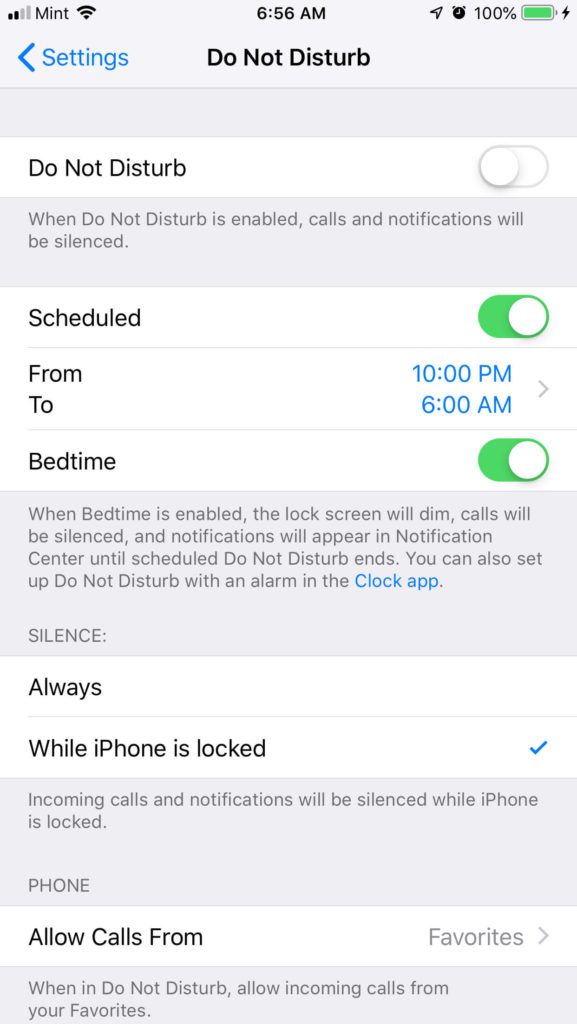
Thankfully, the iPhone has a cool feature where you can schedule “Do Not Disturb” mode. I have my phone set to automatically turn on this mode–which blocks all notifications–at 10:00 every night and turn off at 6:00 every morning.
Go to Settings > Do Not Disturb and toggle on “Scheduled” to set it up.
I also don’t sleep with my phone next to my bed–these two factors together mean I get much better rest overnight.
How many of these iPhone tips were new to you? Which ones did you find most useful?
Don’t forget to save for later on Pinterest or share with your friends who could use these tips!
